company logo

Help center

Go to Cleanvoice
API DocsPrivacy Policy
All collectionsFeatures and TemplatesPreset and Custom TemplatesCustom TemplateCustom Templates Based on Use CasesSave and export output in different formats

Save and export output in different formats

Follow step-by-step process to save and export your edited and downloadable files in different formats (than the original one).

How to Save and Export Edited Results / Output in Different File Formats With Cleanvoice?

You can do it only by creating a custom template.

warning icon
You must have a Cleanvoice account to use a custom template. Custom Templates are not available for the Guest Uploads.

Sign up for free here and start creating your template.

  • Step-1: Login to your Cleanvoice Account and upload your audio or video files.

  • Step-2: Click on “New Custom Template”.
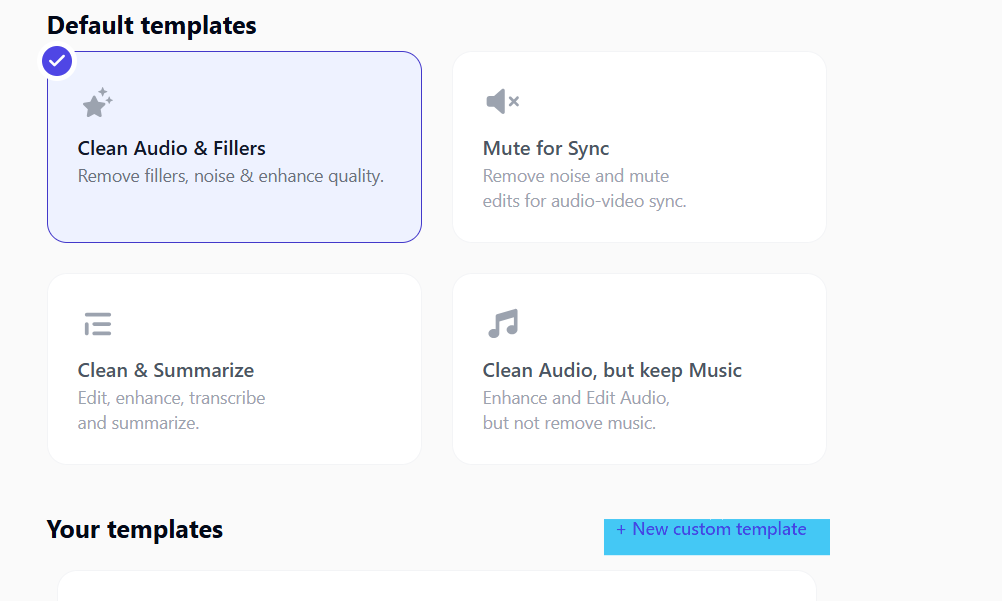
  • Step-3: Select the features you want to apply from the tab / column “Edit”, and then “Enhance”.
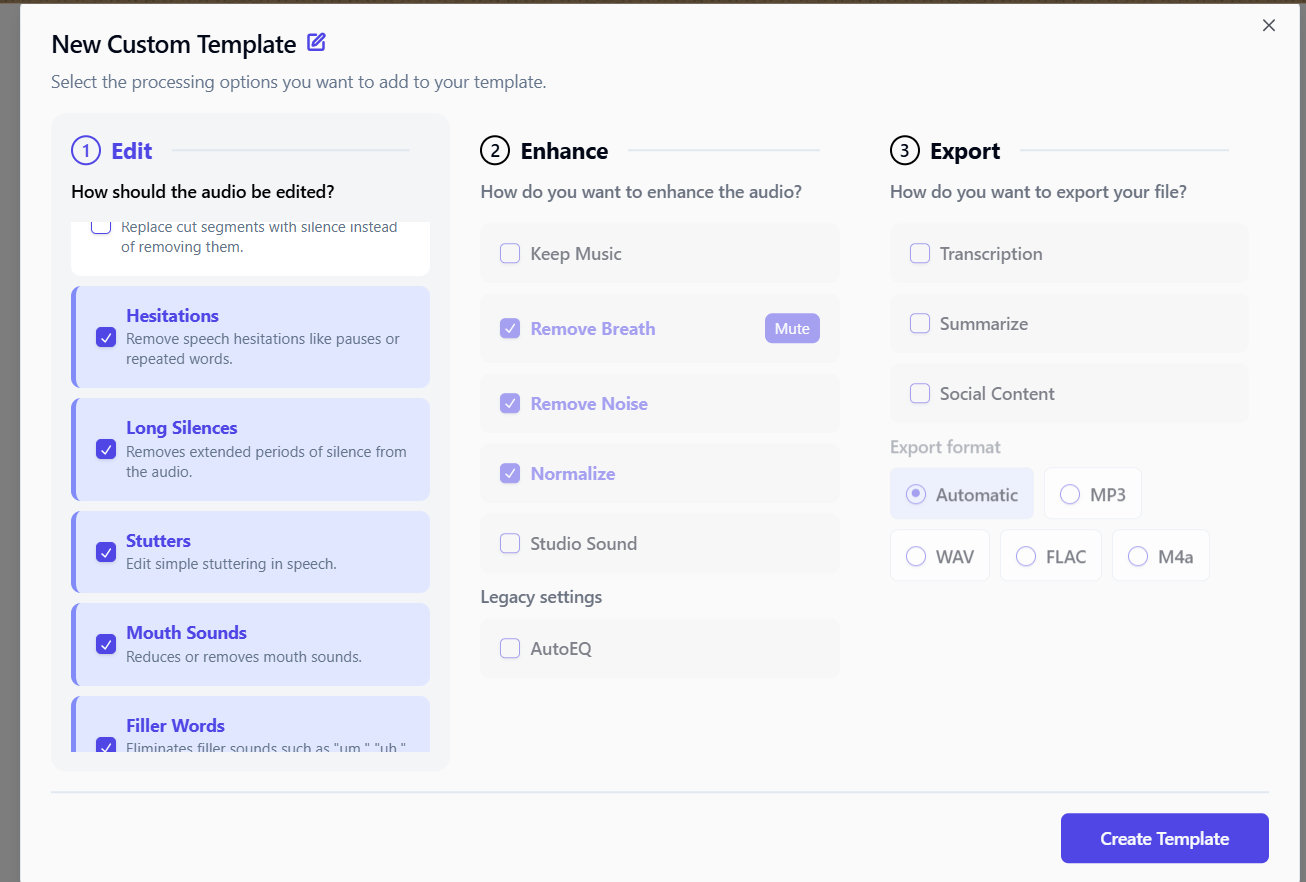
  • Step-4: In the tab 3 (“Export”), select your desired export format for the output file.

success icon
Important: You can choose a specific format (e.g., .mp3, .wav, etc.).

If you choose "Automatic", your edited results will be downloded in the same format as the uploaded or original file.
  • Step-5: Give your template a name and click “Create Template”. This will save your settings for the future use.

info icon
Whenever you need to export or download your edited files in a specific format (e.g. WAV), you can use such saved template.

You won’t have to create a new one every time.

  • Step-6: Click on the template you just created, start the auto-editing process. Once it’s done, you can directly download it.

OR: Watch This Video

Did this answer your question?
😞
😐
😁